

Data-driven Segments
Create dynamic segments that update automatically based on user traits, events, and feedback data
Use when: You want dynamic groups based on user traits, tracked events, feedback interaction, or past survey answers.
What are data-driven segments?
A data-driven segment is a group of users that updates automatically based on conditions you define. Users enter the segment when they match your rules and leave when they no longer match.
In the dashboard, data-driven segments appear with a Dynamic badge. Membership changes as encatch receives new user data, feedback activity, or tracked events, without you editing the list manually.
What data can you use?
You can add as many conditions as needed to define a segment. encatch supports filter groups so you can combine conditions with AND/OR logic. All condition types below can be mixed in a single segment.
When you click Add condition, choose one of:
- User Traits
- Tracked Events
- Feedback Interaction
- Feedback Response
User Traits
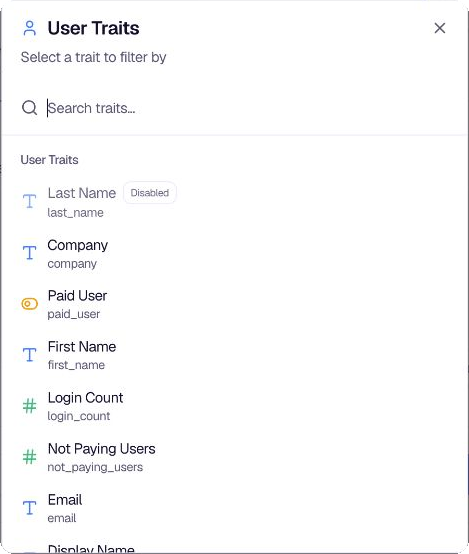
User Traits are attributes on the user profile. They appear when you choose User Traits from Add condition.
In the trait list:
- User Traits: System fields and custom traits (for example
email,device_os,plan) - Account Data: Account-related traits
Examples of system fields: user_name, display_name, email, first_seen_at, last_seen_at, feedback_views_count, feedback_response_count, device_os, browser, sdk_version.
Custom traits are sent when identifying users via identifyUser or the API. See User Traits to configure traits.
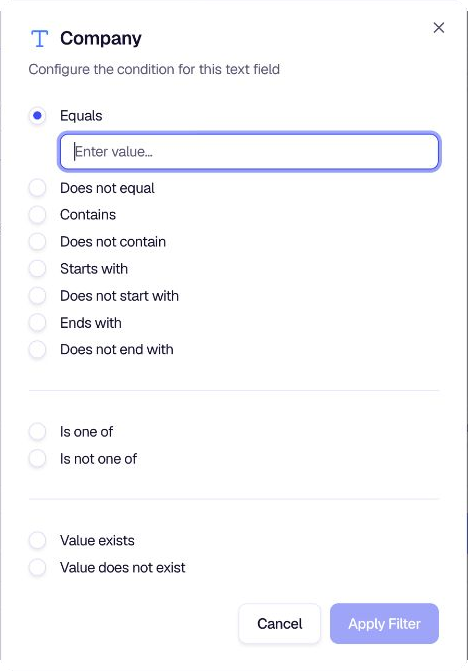
Operators by data type (labels as shown in the UI):
| Data type | Operators |
|---|---|
| Text | Equals, Does not equal, Contains, Does not contain, Starts with, Does not start with, Ends with, Does not end with, Is one of, Is not one of, Value exists, Value does not exist |
| Numeric | Equals, Does not equal, Greater than, Less than, Greater than or equals, Less than or equals, Value exists, Value does not exist |
| Boolean | Is True, Is False, Value exists, Value does not exist |
| Datetime | Less than … ago, More than … ago, After (fixed date), Before (fixed date), Value exists, Value does not exist |
Feedback Response
Feedback Response conditions filter users by what they answered on a past feedback form.
When adding a condition:
- Choose Feedback Response from Add condition.
- Select the feedback form and question.
- Choose which response to evaluate when a user has multiple submissions:
- All responses
- Specific response (for example First, Second, Third, or Last, Second last, Third last)
- First or Last N responses (2 or 3), matching if any of those responses meet the condition
- Set the operator and value based on question type.
Supported question types include rating, NPS, CSAT, opinion scale, single choice, multiple choice, picture choice, ranking, nested selection, matrix questions, short/long text, yes/no, consent, email, website, and more. Operators vary by type. For example, NPS supports is, is not, is greater than, is between; single choice supports is, is any of, is none of.
Examples:
- NPS is 9 or 10 on "Customer Satisfaction Survey" (promoters).
- CSAT is less than or equals 2 on a support survey (detractors).
- Single choice is "Enterprise" on a plan question.
Feedback Interaction
Feedback Interaction conditions filter users by form engagement, not by answer content.
Interaction types:
| Type | Meaning |
|---|---|
| Feedback Seen | The form was shown to the user |
| Feedback Not Seen | The form was not shown to the user |
| Feedback Started | The user started the form |
| Feedback Dismissed | The user closed the form before submitting |
| Feedback Completed | The user submitted the form |
| Feedback Answered | The user answered at least one question |
For each interaction, choose:
- Feedback form: Any Feedback Form, or a specific form
- Timeframe: Last 24 hours, Last 48 hours, Last 7 days, Last 14 days, Last 30 days, Last 90 days, Last 180 days, Last 365 days, or All time
Examples:
- Feedback Completed on "Onboarding Survey" in the last 30 days.
- Feedback Seen on "Pricing Survey" but Feedback Completed did not occur (use two conditions in a filter group).
Tracked Events
Tracked Events conditions filter users by in-app actions sent via trackEvent() in the SDK or API.
Operators:
- Event occurred
- Event did not occur
- Event occurred at least… (with a count)
- Event occurred at most… (with a count)
Set a timeframe (same options as Feedback Interaction) for when the event should be counted.
Examples:
checkout_completedoccurred at least once in the last 7 days.feature_useddid not occur in the last 30 days.
Configure event slugs in Tracked Events before using them in segments.
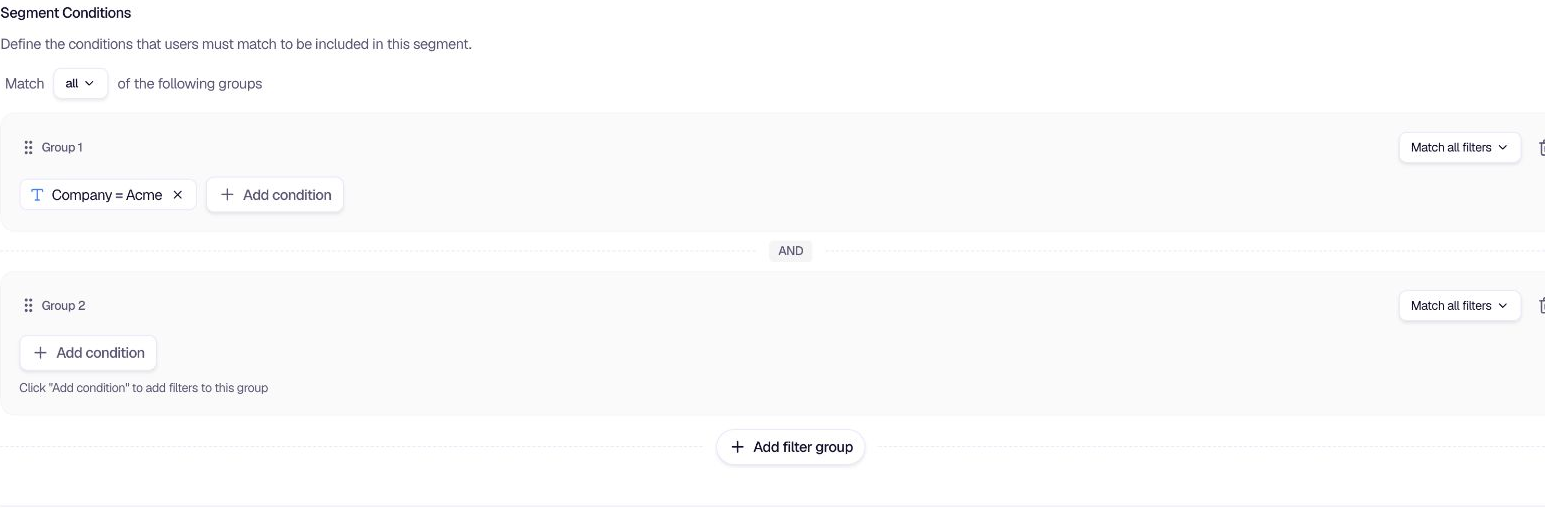
Filter groups and match logic
Within a filter group:
- Match all filters: Every condition in the group must be true (AND).
- Match any filter: At least one condition must be true (OR).
Across groups:
- Use Add filter group for more complex logic.
- Combine groups with Match all or Match any of the groups.
You can mix User Traits, Tracked Events, Feedback Interaction, and Feedback Response in the same segment.
Example: Group 1 (plan equals enterprise) AND Group 2 (NPS is less than or equals 6 on "Q1 NPS").
Create a data-driven segment
Step 1: Open Segments
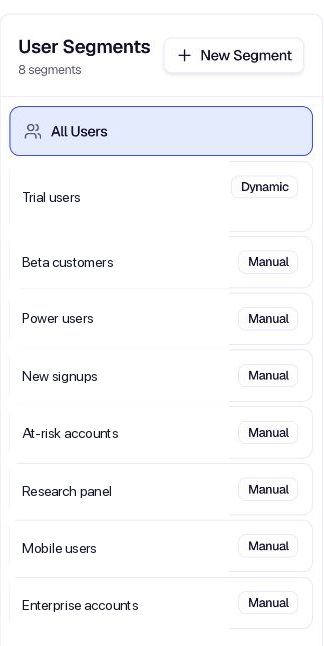
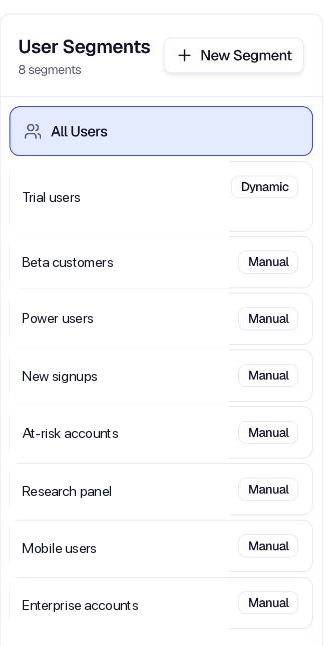
In the encatch dashboard, click Segments in the left sidebar. The page shows your existing segments, including All Users. New Segment is on All Users.
Step 2: Create a new segment
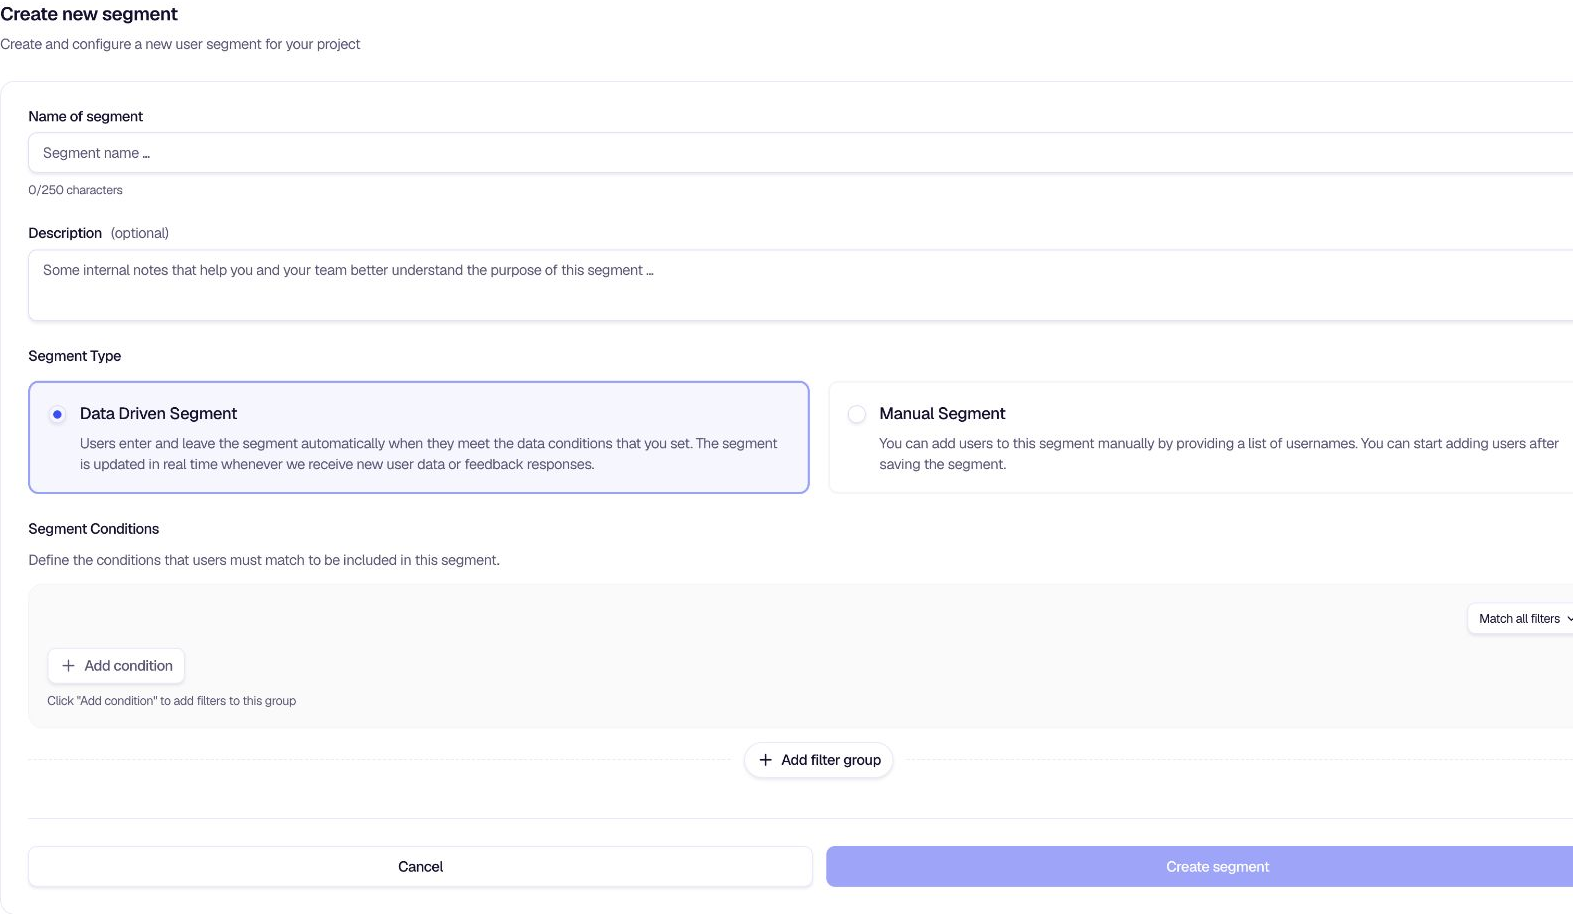
Click New Segment and configure:
- Name of segment: A label (e.g. "Enterprise detractors"). Max 250 characters.
- Description (optional): Short purpose note.
- Segment type: Select Data Driven Segment.

Step 3: Add conditions
In the Segment Conditions section, click Add condition and choose one of:
- User Traits: Filter by user properties
- Tracked Events: Filter by user behavior
- Feedback Interaction: Feedback seen, started, completed, etc.
- Feedback Response: Filter by what users answered
Configure each condition in the dialog that opens. Add more conditions and filter groups as needed.

Step 4: Live Preview
While building conditions, use Live Preview at the bottom of the page to see a sample of matching users before you save.
- Shows up to 50 users who match your current conditions.
- Click Refresh after changing conditions to update the preview.
- If you change conditions without refreshing, the preview may show as outdated until you refresh again.
Step 5: Save the segment
Click Create segment. encatch rebuilds membership for all users in the project. During rebuild:
- A Segment is being rebuilt banner appears on the segment page.
- Depending on the size of your user base, this may take a few minutes.
- The segment appears in the list with a Dynamic badge when saved.
Update a data-driven segment
On a data-driven segment page:
- Update conditions: Opens the edit page where you can change segment conditions. Saving triggers a full rebuild.
- Edit segment (dropdown): Change name or description.
- Delete segment (dropdown): The segment disappears at once. Its members are removed in the background, usually within 15 minutes.
Delete restrictions: If the segment is used by a feedback form (or another consumer), deletion is blocked and you will see which items reference it. Remove the segment from those places first, then delete.
When are segments updated?
encatch updates segment membership in two ways:
Per-user updates
When significant user activity occurs, encatch re-evaluates whether that user still matches each data-driven segment. This includes when:
- A user is identified via
identifyUser - A user sees, starts, completes, or dismisses a feedback form
- A new tracked event is recorded for the user
- A user submits a feedback response
Full rebuild
A full rebuild runs when you:
- Create a new data-driven segment
- Save updated conditions on an existing segment
During a rebuild, encatch checks every user in the project against the segment rules. The member table refreshes automatically when the rebuild completes.
View and manage members
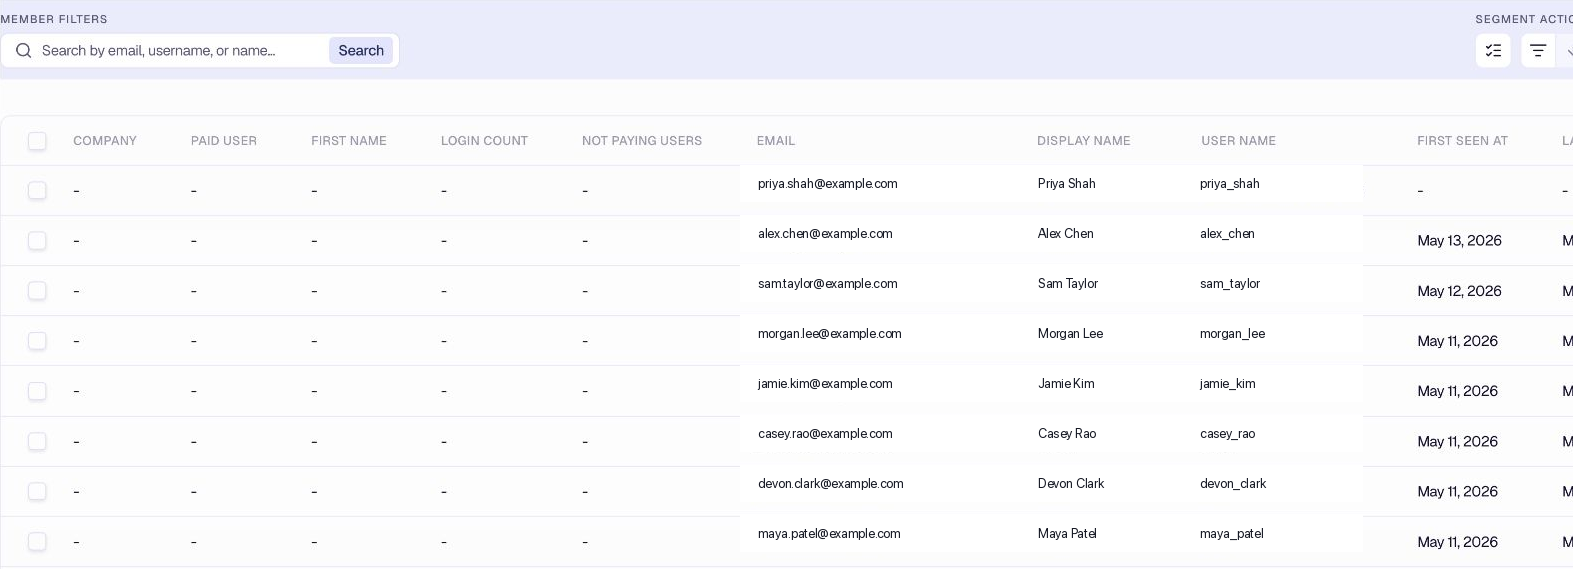
Click a segment in the list to open its member table.
Default columns (for new segments): Username (always visible), Display Name, Email, First seen at, Last seen at, Feedback Views Count, Last feedback submission.
Search and sort: Find users by email, username, or display name. Use Sort by and filters to organize the list.
Custom columns: Use the column settings control to show or hide trait columns in the table.
User detail: Click a user to open the detail drawer with these tabs:
- Feedback Activity (includes expandable past responses)
- Traits
- Segments
- Tracked Events
Show info: View segment name, description, member count, created/updated timestamps, and last calculation time.
Bulk actions: Select users and use Bulk Actions to:
- Add to segment: Copy selected users into a manual segment
- Delete Users: Remove up to 1,000 selected people from the project. In Delete users, under Feedback responses, choose Keep responses, remove the user or Delete their responses too. Job status → Deleted users shows who requested it and how far it has gone. Undo delete is available for 5 minutes, before removal starts. A failed request has Retry there.
You cannot remove individual users from a data-driven segment. Membership is controlled by conditions only.
Summary
| Step | Action |
|---|---|
| 1 | Open Segments from the sidebar |
| 2 | Click New Segment and choose Data Driven Segment |
| 3 | Enter name and optional description |
| 4 | Add conditions (traits, events, feedback interaction, feedback response) |
| 5 | Use Live Preview to verify matching users |
| 6 | Click Create segment (rebuild runs) |
| 7 | View members, customize columns, and inspect users in the detail drawer |
Related
Was this page helpful?